Get data in PowerBi

In this article you will go through how to load the data into PowerBi desktop for further analysis. We will see how load the SQL data.
Required prerequisite is none.
Every person who understand English can go through this.
Get data from relational data sources
If your organization uses a relational database for sales, you can use Power BI Desktop to connect directly to the database instead of using exported flat files.
Connecting Power BI to your database will help you to monitor the progress of your business and identify trends, so you can forecast sales figures, plan budgets and set performance indicators and targets. Power BI Desktop can connect to many relational databases that are either in the cloud or on-premises.
Scenario
The Sales team at Tailwind Traders has requested that you connect to the organization's on-premises SQL Server database and get the sales data into Power BI Desktop so you can build sales reports.

Connect to data in a relational database
You can use the Get data feature in Power BI Desktop and select the applicable option for your relational database. For this example, you would select the SQL Server option, as shown in the following screenshot.
Tip
Next to the Get Data button are quick access data source options, such as SQL Server.

Your next step is to enter your database server name and a database name in the SQL Server database window. The two options in data connectivity mode are: Import (selected by default, recommended) and DirectQuery. Mostly, you select Import. Other advanced options are also available in the SQL Server database window, but you can ignore them for now.

After you've added your server and database names, you'll be prompted to sign in with a username and password. You'll have three sign-in options:
Windows - Use your Windows account (Azure Active Directory credentials).
Database - Use your database credentials. For instance, SQL Server has its own sign-in and authentication system that is sometimes used. If the database administrator gave you a unique sign-in to the database, you might need to enter those credentials on the Database tab.
Microsoft account - Use your Microsoft account credentials. This option is often used for Azure services.
Select a sign-in option, enter your username and password, and then select Connect.

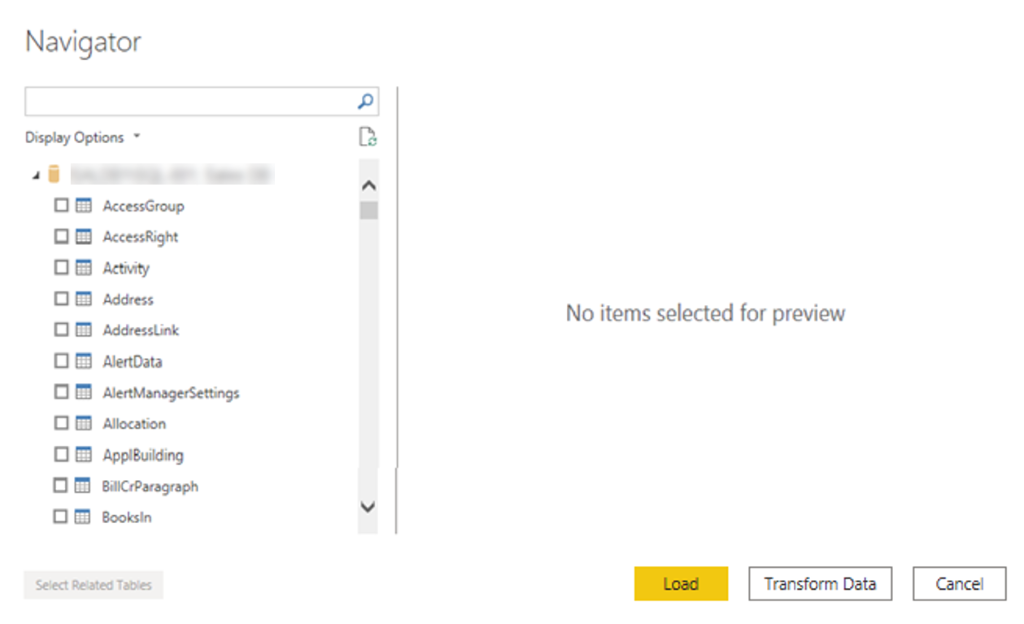
Select data to import
After the database has been connected to Power BI Desktop, the Navigator window displays the data that is available in your data source (the SQL database in this example). You can select a table or entity to preview its contents and make sure that the correct data will be loaded into the Power BI model.
Select the check box(es) of the table(s) that you want to bring in to Power BI Desktop, and then select either the Load or Transform Data option.
Load - Automatically load your data into a Power BI model in its current state.
Transform Data - Open your data in Microsoft Power Query, where you can perform actions such as deleting unnecessary rows or columns, grouping your data, removing errors, and many other data quality tasks.

Import data by writing an SQL query
Another way you can import data is to write an SQL query to specify only the tables and columns that you need.
To write your SQL query, on the SQL Server database window, enter your server and database names, and then select the arrow next to Advanced options to expand this section and view your options. In the SQL statement box, write your query statement, and then select OK. In this example, you'll use the Select SQL statement to load the ID, NAME and SALESAMOUNT columns from the SALES table.


